
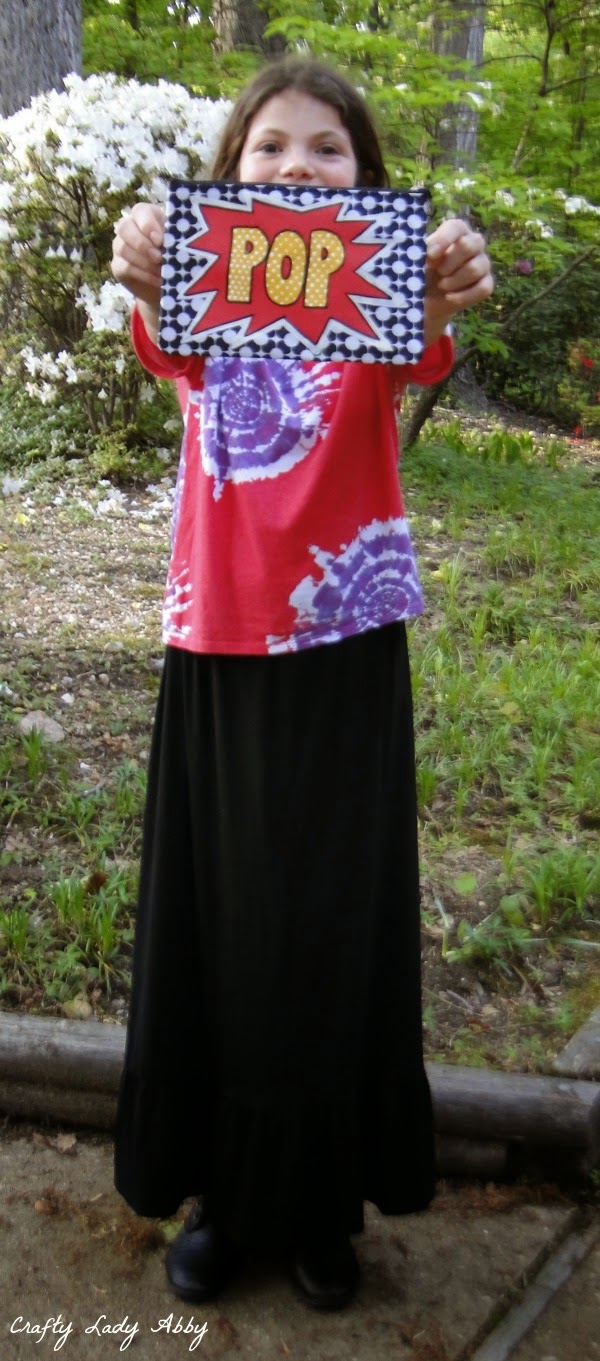
BAG TUTORIAL: Pop Art Bag
I wanted to create a few graphic bags using inexpensive or old bags. My favorite place to find inexpensive bags is a dollar store. I found a set of two floral print makeup bags for $1. They remind me of 1960s pop art, so I chose to add the word "POP" to one in a comic book style. This style of wording varies. I remember it in old comic books, the 60s Batman TV show, and the artwork of Roy Lichtenstein. You can make a simple one like I did, or something more complicated like some in the collage below or from Roy Lichtenstein. I used a printed bag, because that is what I found. A solid color bag would be great too. Use your imagination for color and graphic combos. Ok, onto the tutorial!


SUPPLIES:
INSTRUCTIONS:
1) With the piece of chalk, draw out a burst shape. I drew the POP too, just to get an idea of how big to make the burst.
2) With the liner brush, dip it into the white paint bottle. Carefully outline the burst with the brush and paint. Using the flat brush, dip it into the white paint bottle. Carefully fill in the burst shape. Let this coat dry. Repeat for a 2nd coat. Let dry again. Clean the brushes.

3) Dip the liner brush into the red paint bottle. Carefully make a burst shape slightly in from the edge of the white burst. Dip the flat brush into the red paint bottle. Carefully fill in the red burst shape. Let dry completely. Repeat for a second coat. Wash brushes.

4) With the chalk, draw the "POP" letters.
5) Dip the liner brush into the yellow paint bottle. Carefully outline the POP letters. Use the flat paint brush to fill in the letters with yellow paint. Let this dry completely. Give the letters a 2nd coat if needed.
6) Time to add the dots. Pour a little white paint on the plate or paper. Dip the end of one paint brush handle into the white paint. Going in rows, make dots with the paint brush end and white paint, alternating the dots for each row. Dip the brush end back into the paint as needed. Do this for each letter. I tried to make the rows as even as possible. Let the paint fully dry. This might take longer than the previous coats of paint, since the dots can have a bit of dimension to them.
7) Make sure the paint pen is primed and the paint is flowing well. Carefully outline the red burst and letters. After the paint it dry, the bag is ready to use!

That's all for this tutorial. This design could be used on other things too...clothing, pillows, shoes, furniture...what ever you desire. It's an easy way to add a little retro whimsy to your life. Happy Makery!
Some inspiration for other comic book style words. I included this modern version featuring text slang, because that would be suitable too.
SUPPLIES:
- 1 Flat bag - Mine is a thin makeup bag from Dollar Tree. A clutch or tote bag would also be suitable
- Tulip Soft fabric paint - I used red, yellow, and white in the velveteen finish. The matte finish would also be suitable for this project
- 1 Thin black paint pen - This is to outline the design
- 1 Thin liner paint brush - For careful painting
- 1 Small flat paint brush - For filling in large areas
- A cup of water and paper towels - For cleaning the brushes in between colors
- 1 Foam plate or scrap of paper - For holding a small amount of paint for one step
- 1 White piece of chalk - To draw the design. Any mistakes can be removed with a damp cloth, before paint it added over top of the marks
INSTRUCTIONS:
1) With the piece of chalk, draw out a burst shape. I drew the POP too, just to get an idea of how big to make the burst.
2) With the liner brush, dip it into the white paint bottle. Carefully outline the burst with the brush and paint. Using the flat brush, dip it into the white paint bottle. Carefully fill in the burst shape. Let this coat dry. Repeat for a 2nd coat. Let dry again. Clean the brushes.
3) Dip the liner brush into the red paint bottle. Carefully make a burst shape slightly in from the edge of the white burst. Dip the flat brush into the red paint bottle. Carefully fill in the red burst shape. Let dry completely. Repeat for a second coat. Wash brushes.
4) With the chalk, draw the "POP" letters.
5) Dip the liner brush into the yellow paint bottle. Carefully outline the POP letters. Use the flat paint brush to fill in the letters with yellow paint. Let this dry completely. Give the letters a 2nd coat if needed.
6) Time to add the dots. Pour a little white paint on the plate or paper. Dip the end of one paint brush handle into the white paint. Going in rows, make dots with the paint brush end and white paint, alternating the dots for each row. Dip the brush end back into the paint as needed. Do this for each letter. I tried to make the rows as even as possible. Let the paint fully dry. This might take longer than the previous coats of paint, since the dots can have a bit of dimension to them.
7) Make sure the paint pen is primed and the paint is flowing well. Carefully outline the red burst and letters. After the paint it dry, the bag is ready to use!
That's all for this tutorial. This design could be used on other things too...clothing, pillows, shoes, furniture...what ever you desire. It's an easy way to add a little retro whimsy to your life. Happy Makery!
Comments
Post a Comment